Remote podcast recording lets you interview anyone, anywhere. It eliminates travel costs, simplifies scheduling, and helps you maintain consistent episodes. It also opens the door to a broader range of voices and allows you to move quickly on timely topics without waiting for an in-person setup.
But it also changes how your show is produced. When guests join from home, you’re no longer just managing audio — you’re also considering video quality, lighting, camera angles, and overall presentation.
And that’s precisely what this article is about: how to plan, record, and produce remote episodes that sound professional, look polished, and feel just as engaging as if you were in the same room.
Step 1: Building a Professional Remote Podcast Setup
A good remote setup is the one thing you can control. You can’t fix your guest’s background noise or their Wi-Fi connection, but you can ensure that your side of the recording sounds clear, looks professional, and requires as little editing as possible later. And that all starts with your environment.
Choose a consistent recording space
Pick one location and stick with it. A small, quiet room with rugs, curtains, and soft furniture will absorb echoes, making your audio cleaner before you even touch a microphone. Recording in the same space every time also keeps your sound consistent from one episode to the next, which makes editing easier and your show feel more polished overall.

Prioritise professional audio
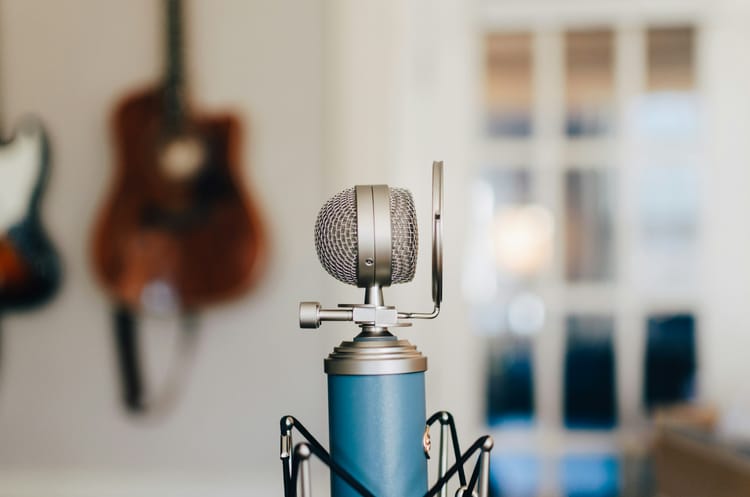
Once you’ve locked in the right environment, the next priority is audio — because no amount of editing can fix bad sound. Your microphone will make the single biggest difference in quality, so it’s worth choosing the right one for your recording style.
USB microphones are the simplest option. They plug directly into your computer and are ideal if you’re recording solo or keeping your setup mobile. They’re affordable, easy to use, and still deliver strong sound quality. The Rode NT-USB and Blue Yeti are two popular picks that perform well for most remote podcasters.
XLR microphones, on the other hand, are more advanced and require an audio interface to connect to your computer. They’re more expensive and less portable, but the payoff is noticeable: better dynamic range, richer tone, and more control over your sound. They’re handy if you’re recording with more than one person in the same room, because you can connect multiple mics to a single interface and balance levels individually. The Shure SM7B and Rode PodMic are industry standards for this setup.
Beyond the microphone itself, a few accessories can make a big difference. A pop filter softens harsh plosive sounds like “p” and “b,” while a boom arm keeps the mic stable and in the proper position throughout the interview. Closed-back headphones are another underrated essential — they help you monitor audio in real time and catch issues like clipping, echo, or interference before they end up in your final recording.

Add video if it’s part of your plan
From there, think about whether video is part of your plan. You don’t need it to run a successful podcast, but if you want to repurpose episodes for YouTube or social platforms, it’s worth setting up properly from the start.
And it’s becoming more common — 41% of podcast listeners in the U.S. now watch episodes instead of just listening.
If that’s a goal for you, consider using a 1080p webcam or connecting a DSLR camera via a capture card. Soft, diffused lighting and a clean background make your visuals feel intentional, helping your show stand out when clips are shared online.
Control every detail you can
Finally, take control of the variables that are often overlooked. Silence notifications, switch off noisy devices, and record when your environment is naturally quiet. Avoid rooms with hard, reflective surfaces that bounce sound around, and aim to record at the same time of day to maintain consistent lighting and ambient noise.
These minor adjustments make a big difference when it comes to producing a show that feels professional from start to finish.
Step 2: Choosing the Right Podcast Interview Tools
Avoid standard video call tools like Zoom or Google Meet. They’re built for meetings, not media, and compress audio and video heavily. Instead, choose platforms that record locally on each participant’s device before uploading. That means better quality and fewer problems if someone’s internet drops.
Here are some of the most popular options and what they’re best for:
- Riverside
- Local audio and video recording for the highest quality, even if the internet drops.
- Separate tracks for each speaker, making editing easier and more flexible.
- Built-in browser-based editor and clip creation tools for repurposing content.
- 4K video support if video is part of your strategy.
- SquadCast.fm
- Studio-quality local recording with minimal compression.
- Clean, intuitive interface and strong reliability, even with multiple guests.
- Direct integrations with Descript and other editing tools.
- Built-in backup recording to avoid data loss.
- Zencastr
- Easy to use with simple one-click browser access (no downloads needed).
- Automatic post-production features like noise reduction and audio levelling.
- Separate track recording and automatic cloud uploads.
- Great lightweight option if you want simplicity over advanced features.
- Zoom (only if necessary)
- Familiar and accessible for guests, but with lower audio quality and compressed recordings.Works best as a backup option rather than a primary tool.
Choosing a dedicated remote podcast recording platform gives you more control, higher quality, and fewer editing headaches. Once you’ve locked in the tool that fits your workflow, recording with remote guests becomes far more seamless.
Step 3: Prepping Guests and Setting Expectations
This is the part of remote podcasting that’s mostly out of your hands. But it doesn’t mean you’re powerless. The key is to be proactive. Here’s how.

Do your homework before the invite
Before confirming a guest, check out any past podcast appearances they’ve done. Watch or listen to see:
- What was the audio and video quality like?
- Whether they had a professional setup or just used built-in gear
- How comfortable and natural they were speaking remotely
This provides a realistic idea of what to expect, allowing you to plan accordingly. If their setup wasn’t great, you’ll know you need to offer more guidance ahead of time. Or you might need to choose another guest altogether.
Be clear about expectations early
Once the interview is booked, communicate exactly what they’ll need to prepare. The more specific you are, the smoother the recording will go. You can do this with a simple pre-interview email or, for high-profile guests, a quick 10-minute prep call. Make sure to cover:
- Audio setup: Ask them to use an external microphone or a high-quality headset.
- Environment: Recommend a quiet, carpeted room with minimal background noise.
- Internet connection: Ask them to connect via Ethernet or sit close to their router.
- Browser choice: Many recording platforms work best on Chrome — let them know in advance.
- Headphones: Encourage them to wear headphones to prevent echo.

Provide a short checklist
Make it easy for them to follow your instructions by including a short checklist in your email. A one-page guide with “do’s and don’ts” — like muting notifications, closing unused apps, and silencing phones — removes guesswork and improves results.
Share recording details ahead of time
Guests feel more confident when they know what to expect. A few days before the interview, send them:
- A brief outline of the topics you’ll cover
- An estimated duration for the recording
- Whether it will be video, audio-only, or both
- What time should they join the call and how
This small step helps them feel prepared, keeps the conversation focused, and reduces last-minute surprises.
Sample Guest Prep Email
Step 4: Recording Workflows That Work
Once your setup is dialled in and your guest is prepped, it’s time for the part that matters most: hitting record. Whether you record podcast online or in a studio, the process should follow a clear structure from start to finish.
Do a pre-interview tech check
Five minutes before the interview starts, do a quick run-through with your guest. Confirm that:
- Their microphone is connected, and the input levels appear to be good.
- They’re wearing headphones, and you’re not hearing an echo.
- The environment is quiet and free from background noise.
- Their camera (if using video) is properly framed and lit.
Most podcast interview tools, such as Riverside, SquadCast, and Zencastr, include built-in audio and connection checks. Taking two minutes here can save you hours in editing later.
Start with a short warm-up
Before you dive into questions, take a few minutes to chat casually. This serves two purposes: it helps your guest relax and allows you to listen for any technical issues that may have slipped through the initial check.
If something sounds off, it’s easier to fix it now than ten minutes into the recording.
Record separate tracks whenever possible
If your platform supports it, always record each participant’s audio and video on separate tracks. This gives you far more flexibility in post-production. You can adjust levels individually, cut interruptions cleanly, and even remove background noise from one track without affecting the other. Most dedicated tools offer this as a default feature.
Take notes as you go
Mark key moments in real time — timestamps where you might want to insert music, cut a long tangent, or highlight a great quote. This small habit will significantly speed up the editing process and help you shape the episode more intentionally.

Step 5: Edit and Polish for a Studio-Quality Feel
The fundamentals of editing are the same whether you’re in a studio or recording remotely — tighten pacing, balance levels, and remove distractions. But remote conversations bring extra challenges: mismatched audio quality, slight lag, background noise, or awkward pauses. Editing here is about solving those problems so the final episode feels like you were both in the same room.
Here’s what to focus on:
- Smooth out inconsistent audio: Guest audio often sounds thinner or harsher than yours. Use EQ to balance tone and compression to even out volume levels. Noise reduction tools like iZotope RX or Adobe Audition’s built-in filters can remove hum, hiss, or room noise.
- Fix remote-specific issues: Small sync drifts, clipped words, or lag are common in remote recordings. Realign tracks manually if they’re out of sync and trim dead air caused by latency. For occasional dropouts, use crossfades or record quick pickup lines.
- Make pacing feel natural: Remote conversations usually have more pauses or moments where people talk over each other. Tighten silences, slightly overlap dialogue where needed, and remove filler words — but leave enough imperfections to keep it sounding human.
- Match audio for a cohesive mix: Aim for both voices to sound like they were recorded in the same space. Adjust the EQ curves, loudness, and levels to ensure they blend seamlessly. A reference track from a previous episode helps keep consistency. Target around -16 LUFS for a polished, professional result.
- Add finishing touches: Branded intros and outros, subtle music transitions, and sponsor messages at natural breaks elevate the final product and make your show feel intentional.
When you edit remote interviews this way, listeners forget about the tech and focus on the conversation, which is exactly the point.
Bonus: Troubleshooting Common Remote Recording Issues
Even with the best prep and tools, remote recordings don’t always go perfectly. Here’s how to handle the most common problems before they derail an episode:
- Poor audio quality: If a guest doesn’t have an external mic, have them use wired headphones with a built-in microphone — they often sound clearer than a laptop mic. Ask them to sit close to the mic, speak directly into it, and avoid moving around while talking. You can also boost clarity slightly in post with EQ and compression, but the closer and more consistent the source, the better.
- Background noise: If noise creeps in mid-interview (think dogs barking, keyboards clacking, or street sounds), politely pause and ask them to mute notifications or move to a quieter space. If you’re recording on separate tracks (which you always should) you can temporarily mute their audio while you’re speaking to clean up the final edit. Some podcast interview tools even let you mute guests live, so you can manage noise without disrupting the flow.
- Echo or feedback: Usually caused by guests not wearing headphones. Remind them to put on a pair before recording or lower the speaker volume to prevent sound bleed.
- Connection dropouts: If the internet cuts out, keep recording your side. Most tools with local recording will still capture the guest’s audio, which can be synced later. For live calls, have a backup link or plan to reconnect quickly.
- Sync drift: Tracks can slowly fall out of sync during long recordings. Clap at the start as a sync marker, or use the automatic alignment features in your editing software to adjust it in post-production.
- Video issues: If the video freezes or pixelates, ask the guest to turn off unnecessary background apps or switch to an Ethernet connection. As a last resort, record audio-only to save bandwidth.
- Unprepared guest: If a guest logs in without a proper setup, take five minutes before recording to adjust their environment and settings. A quick mic test and environment check can save hours of editing later.
A few quick fixes and clear communication usually solve most problems on the spot. And the more interviews you record, the easier it becomes to troubleshoot in real time without interrupting the flow of the conversation.

Conclusion: Remote Podcasting That Sounds In-Person
A strong remote podcast setup is what turns a long-distance interview into a conversation that feels like it happened in the same room. With the right tools, clear communication, and a consistent workflow, remote podcast recording can deliver audio and video that sound polished, professional, and engaging. Focus on what you can control, prepare your guests well, and refine your editing process. Do that, and recording from anywhere becomes an advantage, not a limitation.
Ready to take your remote podcast to the next level? Join MatchMaker.fm and connect with high quality guests and grow your audience faster. Start connecting today.